1st of Methods: Through MC Card Tool (MTI-II Card) directly, without MST-II Software
Program reading of KCD-911A motherboard (Replicated motherboard)
1) Power off the elevator
2) Adjust SW1=3, SW2=0 potentiometer of MC card
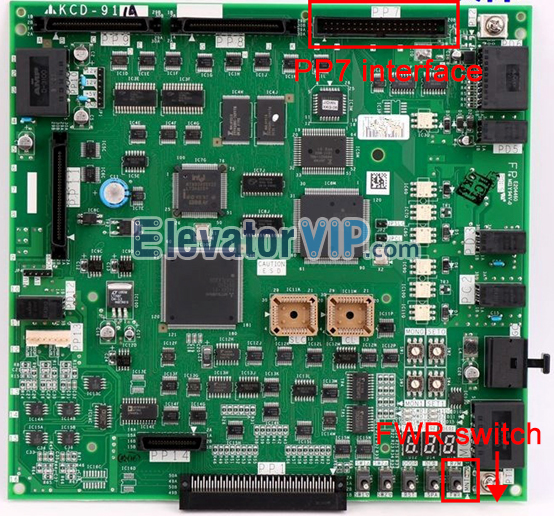
3) One connector of parallel ribbon data cable of MC card to connect PP7 interface of KCD-911A motherboard, the other connector to connect MC card
4) Turn on the switch ‘FWR’ on the board (↓)
5) Power on the elevator, meanwhile, the program reading is in progress
6) If program reading finished, power off the elevator, and then pull off connector of parallel ribbon data cable from KCD-911A motherboard (The program has been read into the MC card)
(Attention: During program reading through MC card (MTI-II), the MTI indicator light starts flashing; After the program reading is finished, the MTI indicator light stops flashing, meanwhile FOK indicator light always on.)
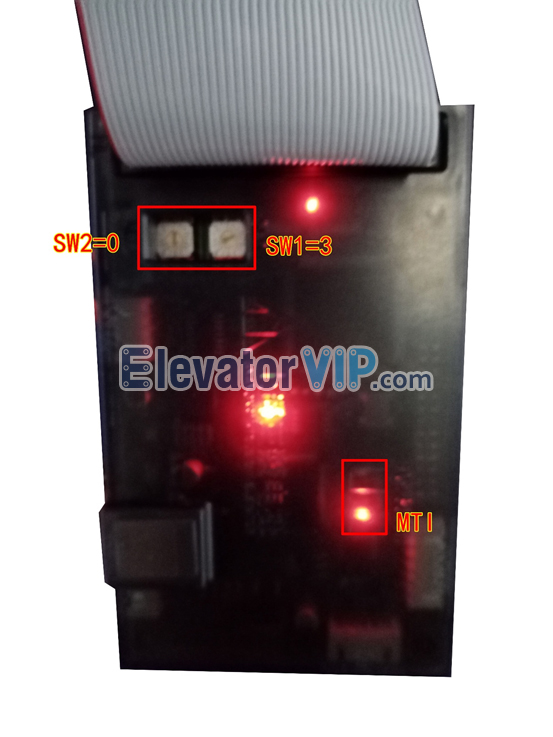
Mitsubishi Elevator MC Card MTI Indicator Light
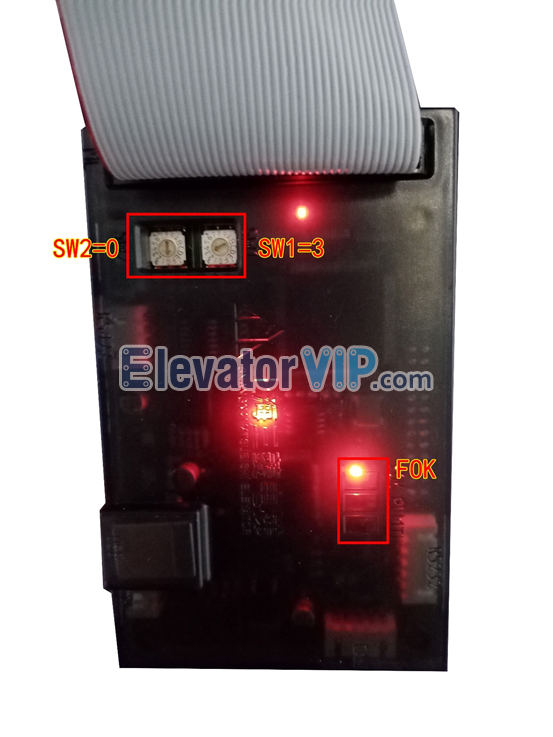
Mitsubishi Elevator MC Card FOK Indicator Light
Program writing of KCD-911A motherboard (Targeted motherboard)
1) Power off the elevator
2) Adjust SW1=5, SW2=0 potentiometer of MC card
3) One connector of parallel ribbon data cable of MC card to connect PP7 interface of KCD-911A motherboard, the other connector to connect MC card
4) Turn on the switch ‘FWR’ on the board (↓)
5) Power on the elevator, meanwhile, the program writing is in progress
6) If program reading finished, power off the elevator, and then pull off connector of parallel ribbon data cable from KCD-911A motherboard
2nd of Methods: Through MC Card Tool (MTI-II Card) and MTS-II Software
Program reading from KCD-911A motherboard to PC (or laptop)
1) Keep the PP7 interface of KCD-911A board to connect MC interface of MC card by parallel ribbon data cable, and then USB interface of MC card to connect PC (or laptop) by USB cable.
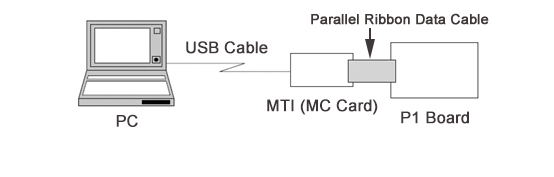
Connection Schematic Diagram of Mitsubishi KCD-911A Board, PC, and MC Card
2) Adjust SW1=1, SW2=0 potentiometer of MC card
3) Launch the software ‘MTS-II’ (MC card software) on the PC (or laptop), input the password.

Mitsubishi Elevator MTS-II Software
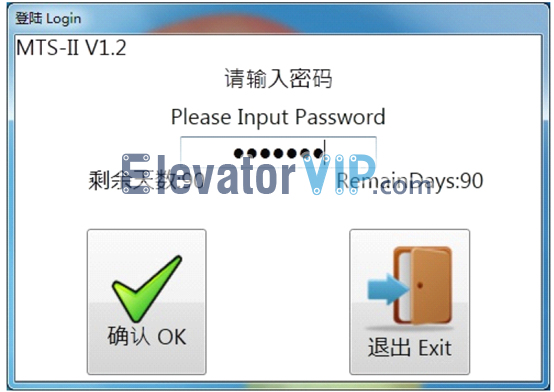
Mitsubishi Elevator MTS-II Software Login
4) Select the ‘FLASHReadWrite’ radio button in Function block, and then select the ‘USB’ radio button in PC Interface block, also select ‘MC’ in the MC tab-page of PCB Interface block.
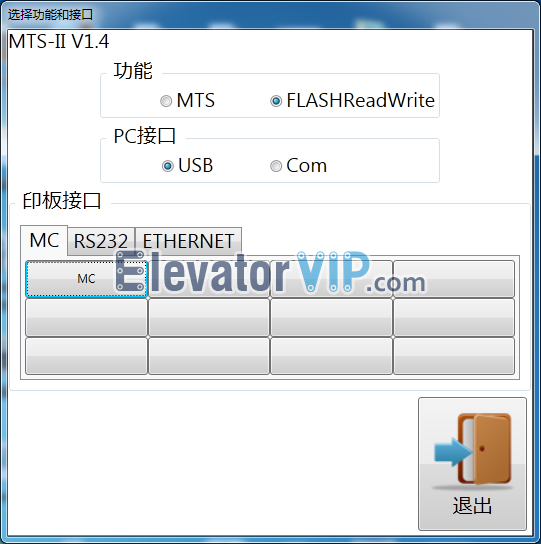
MC Mode of Mitsubishi Elevator MTS-II Software
5) Select the radio button ① (Read program from MTI card) in the reading tab-page; Select the save path ② where program file will be saved on the PC (laptop); Click on the start button to launch ③
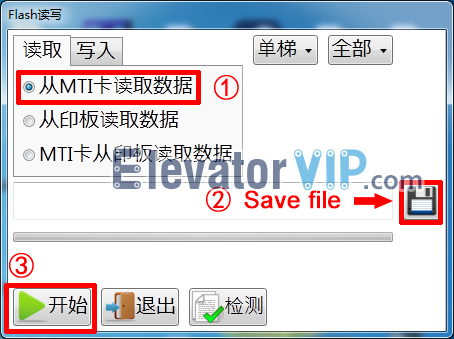
Saving file of Reading program by Mitsubishi MTS-II Software
6) When the program reading is finished, there pops up a checking JDialog (Double to check whether the saved program on the PC (laptop) is consistent with board).
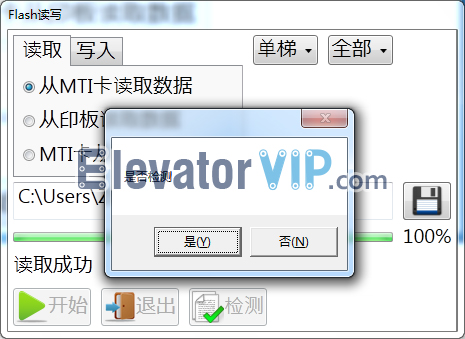
Checking Program Consistency by Mitsubishi MTS-II Software
Program writing from PC (or laptop) to KCD-911A motherboard
1) Power off the elevator
2) Adjust SW1=1, SW2=0 potentiometer of MC card
3) Keep the PP7 interface of KCD-911A board to connect MC interface of MC card by parallel ribbon data cable, and then USB interface of MC card to connect PC (or laptop) by USB cable.
4) Turn on the switch ‘FWR’ on the board (↓)
5) Power on the elevator
6) Launch the software ‘MTS-II’ (MC card software) on the PC (or laptop), input the password.
7) Select the ‘FLASHReadWrite’ radio button in Function block, and then select the ‘USB’ radio button in PC Interface block, also select ‘MC’ in the MC tab-page of PCB Interface block.
8) Select the radio button ② (Write program into KCD-911A board) in the writing tab-page ①; Select the program file (saved by reading program step) to import into the KCD-911A board ③; Click on the start button to launch ④.
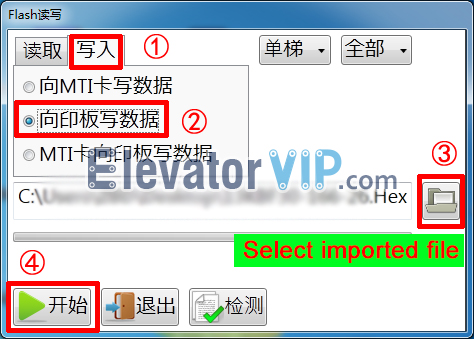
Import The Program by Mitsubishi MTS-II Software
9) Program writing is finished